tutorials
Playgrounds
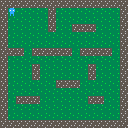
Atmospheric Horror FPS: Monsters & Dread
by
tutorials
Atmospheric Horror FPS: Player Health & Damage
by
tutorials
Atmospheric Horror FPS: The Complete Game
by
tutorials
Atmospheric Horror FPS: Atmosphere
by
tutorials
Atmospheric Horror FPS: Setting the Scene
by
tutorials
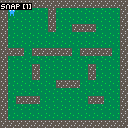
PNG Level Design: The Starting Point
by
tutorials
PNG Level Design: Multi-Sprite Props and Posters
by
tutorials
PNG Level Design: Designing a Bigger Level
by
tutorials
PNG Level Design: Painting a Map Sprite
by
tutorials
PNG Level Design: Multi-Sprite Wall Textures
by
tutorials
Poster Decals & Props: Props & Collision
by
tutorials

Poster Decals & Props: The Starting Point
by
tutorials

Poster Decals & Props: Wall Decals
by
tutorials
Scene & Level Management: Complete Game
by
tutorials

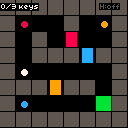
Scene & Level Management: Collectible Keys
by
tutorials
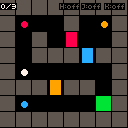
Scene & Level Management: Multiple Maps
by
tutorials
Scene & Level Management: Scene Transitions
by
tutorials
Scene & Level Management: Base Raycaster
by
tutorials
Monster Spawning & Pathfinding: Pathfinding
by
tutorials
Monster Spawning & Pathfinding: Base Raycaster
by
tutorials
Monster Spawning & Pathfinding: Chasing the Player
by
tutorials
Monster Spawning & Pathfinding: Spawn Triggers
by
tutorials
Monster Spawning & Pathfinding: Billboard Sprites
by
tutorials
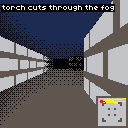
Fog & Lighting: Player Torch
by
tutorials
Fog & Lighting: Base Raycaster
by
tutorials
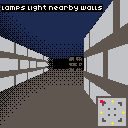
Fog & Lighting: Street Lamps
by
tutorials
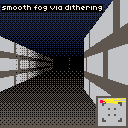
Fog & Lighting: Dithered Fog
by
tutorials

Screen Shake & View Bobbing: View Bobbing
by
tutorials

Screen Shake & View Bobbing: Screen Shake
by
tutorials
Screen Shake & View Bobbing: Base Raycaster
by
tutorials

Sokoban: Levels and Scenes
by
tutorials

Sokoban: Undo and Reset
by
tutorials

Sokoban: The Grid
by
tutorials

Sokoban: Pushing Boxes
by
tutorials

Sokoban: Hint Overlay
by
tutorials

Sokoban: Solving the Puzzle
by
tutorials

Sokoban: Complete Example
by
tutorials

Game Juice: Screen Flash and Freeze Frames
by
tutorials

Game Juice: The Base Game
by
tutorials

Game Juice: Particle Bursts
by
tutorials
Game Juice: Pulsing and Easing
by
tutorials
Scene Management: Building a Level Select
by
tutorials

Scene Management: Tracking Progress
by
tutorials

Scene Management: Adding Transitions
by
tutorials

Scene Management: A Simple Scene Registry
by
tutorials
Hint UI: Drawing Connections
by
tutorials
Hint UI: Highlighting Objects
by
tutorials

Hint UI: The Puzzle
by
tutorials
Hint UI: Complete Example
by
tutorials

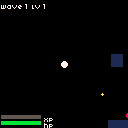
Bullet Heaven: Enemy Waves
by
tutorials

Bullet Heaven: Auto-Fire
by
tutorials
Bullet Heaven: Upgrade Choices
by
tutorials
Bullet Heaven: XP and Leveling Up
by
tutorials
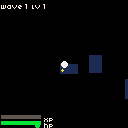
Bullet Heaven: Staying Alive
by
tutorials
Bullet Heaven: The Arena
by
tutorials
Bullet Heaven: Complete Example
by
tutorials

Camera Systems: Follow Camera
by
tutorials
Camera Systems: Complete Example
by
tutorials
Camera Systems: Smooth Camera
by
tutorials
Spawning & Waves: Wave System
by
tutorials
Spawning & Waves: Edge Spawning
by
tutorials
Spawning & Waves: Complete Example
by
tutorials
Object Pooling: Complete Example
by
tutorials
Object Pooling: With Pooling
by
tutorials
State Machines: Mode Variable
by
tutorials
State Machines: Complete Example
by
tutorials

State Machines: No States
by
tutorials

State Machines: Timed Messages
by
tutorials
JRPG: Walking
by
tutorials

JRPG: Turn-Based Combat
by
tutorials

JRPG: Battle UI
by
tutorials
JRPG: Overworld
by
tutorials
JRPG: Complete Example
by
tutorials

JRPG: Random Encounters
by
tutorials
JRPG: Catching Monsters
by
tutorials
Top-Down Adventure: The World
by
tutorials
Top-Down Adventure: Camera
by
tutorials
Top-Down Adventure: Dialogue
by
tutorials

Top-Down Adventure: NPCs
by
tutorials

Top-Down Adventure: Movement
by
tutorials
Top-Down Adventure: Walls
by
tutorials
Racing: Single Racer
by
tutorials

Racing: Two Players
by
tutorials
Racing: Off-track Slowdown
by
tutorials
Racing: Collisions
by
tutorials
Racing: Track
by
tutorials

Racing: Full Race
by
tutorials
Pathfinding: Dijkstra
by
tutorials

Pathfinding: Setup
by
tutorials

Pathfinding: 8-Direction BFS
by
tutorials
Pathfinding: Complete Example
by
tutorials
Pathfinding: A* Search
by
tutorials
Click-to-Move: The Grid
by
tutorials

Click-to-Move: Player on Grid
by
tutorials

Click-to-Move: Grid-Snap Movement
by
tutorials

Click-to-Move: BFS Pathfinding
by
tutorials
Click-to-Move: Free Movement
by
tutorials
Click-to-Move: Complete Example
by
tutorials
Raycasting: Map and Minimap
by
tutorials

Raycasting: Casting Rays
by
tutorials

Raycasting: Drawing Walls
by
tutorials
Raycasting: Player Movement
by
tutorials
Raycasting: Texture Sampling
by
tutorials
Raycasting: Complete Example
by
tutorials
Custom Keybinds: Basic Input
by
tutorials
Custom Keybinds: Complete Example
by
tutorials

Taking Screenshots: Blank Canvas
by
tutorials
Taking Screenshots: Color Palette
by
tutorials
Taking Screenshots: Complete Example
by
tutorials
Map System: First Tilemap
by
tutorials
Map System: Adding Layers
by
tutorials
Map System: Switching Maps
by
tutorials
Map System: Camera Scrolling
by
tutorials
Map System: Complete Example
by
tutorials

Custom Cursor: Hide Cursor
by
tutorials

Custom Cursor: Define Sprite
by
tutorials

Custom Cursor: Draw Cursor
by
tutorials

Custom Cursor: Crosshair
by
tutorials

Virtual Cursor: Keyboard Movement
by
tutorials
Virtual Cursor: Camera World
by
tutorials

Virtual Cursor: Edge Scrolling
by
tutorials

Virtual Cursor: Complete Example
by
tutorials
Save/Load: State Object
by
tutorials

Save/Load: Complete Example
by
tutorials
Platformer: Gravity
by
tutorials
Platformer: Solid Platforms
by
tutorials
Platformer: Horizontal Movement
by
tutorials

Platformer: Jumping
by
tutorials
Platformer: One-Way Platforms
by
tutorials

Platformer: Coyote Time
by
tutorials
Platformer: Enemy Collision
by
tutorials

Platformer: Complete Example
by
tutorials