How to Build Camera Systems
Most games have worlds bigger than the screen. A platformer level stretches for hundreds of pixels. A top-down RPG has towns and dungeons. A survivor-like has an arena the player roams freely. In all of these, the camera needs to follow the player — and do it well enough that the player never thinks about it.
We're gonna build three camera systems from scratch: a basic follow camera, a smooth lerp camera, and screen shake for impact feedback. No sprites, no enemies, no game mechanics — just a player circle moving through an arena full of colored landmarks. By the end you'll have patterns you can drop into any game with a world larger than the screen.
Following the Player
The engine's camera(x, y) function shifts every draw call by that offset. Call camera(10, 20) and everything draws 10 pixels left and 20 pixels up — as if the viewport moved right and down. To center the player on a 128×128 canvas, we set the camera to (playerX - 64, playerY - 64).
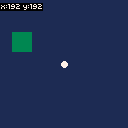
Here's the setup. We've got a 384×384 world (three times the canvas in each direction) with a player circle and some colored landmarks scattered around:
const WORLD = 384;
const CANVAS = 128;
const SPEED = 1.5;

let px = 192;
let py = 192;

const landmarks = [
    { x: 40, y: 40, w: 24, h: 24, color: 8 },
    { x: 300, y: 50, w: 16, h: 32, color: 11 },
    { x: 60, y: 280, w: 20, h: 20, color: 12 },
    { x: 320, y: 320, w: 28, h: 16, color: 9 },
    { x: 180, y: 80, w: 12, h: 12, color: 14 },
    { x: 100, y: 340, w: 18, h: 18, color: 10 },
    { x: 260, y: 200, w: 22, h: 22, color: 13 },
    { x: 350, y: 160, w: 14, h: 30, color: 15 },
    { x: 140, y: 160, w: 20, h: 20, color: 3 },
    { x: 220, y: 300, w: 16, h: 16, color: 5 },
];
The player starts at the center of the world. The landmarks are just colored rectangles at fixed positions — they don't do anything except make the scrolling visible.
The update function moves the player with arrow keys and sets the camera:
function update() {
    if (btn('ArrowLeft')) px -= SPEED;
    if (btn('ArrowRight')) px += SPEED;
    if (btn('ArrowUp')) py -= SPEED;
    if (btn('ArrowDown')) py += SPEED;

    camera(px - 64, py - 64);
}
That's the whole follow camera. px - 64 centers the player horizontally, py - 64 centers vertically. Every frame, the camera snaps to wherever the player is.
There's a catch with the HUD, though. If we draw text while the camera is shifted, it scrolls offscreen with the world. creset() resets the camera to (0, 0), so anything drawn after it stays pinned to the screen:
function draw() {
    cls(1);
    rect(0, 0, WORLD - 1, WORLD - 1, 6);

    for (const lm of landmarks) {
        rectfill(lm.x, lm.y, lm.x + lm.w, lm.y + lm.h, lm.color);
    }

    circfill(px, py, 3, 7);

    creset();
    caption('x:' + Math.floor(px) + ' y:' + Math.floor(py), 1, 1, 7);
}
Move around and watch the landmarks scroll past. The camera sticks to the player perfectly — maybe too perfectly. Walk to an edge and you'll see the void beyond the world boundary. Let's fix that.
Keeping the Camera in Bounds
When the player walks near the world edge, the camera follows them past it and shows empty space. Two things need clamping: the camera position and the player position.
For the camera, the valid range is [0, worldSize - canvasSize]. In our case that's [0, 256] — if the camera X goes below 0 we see void on the left, above 256 we see void on the right. Math.max and Math.min handle this:
let camX = px - 64;
let camY = py - 64;

camX = Math.max(0, Math.min(WORLD - CANVAS, camX));
camY = Math.max(0, Math.min(WORLD - CANVAS, camY));

camera(camX, camY);
Math.max(0, Math.min(256, camX)) reads as "don't go below 0, don't go above 256." The inner Math.min caps the top end, the outer Math.max caps the bottom.
We also clamp the player to the world boundaries minus their radius, so they can't walk through the edge:
px = Math.max(3, Math.min(WORLD - 4, px));
py = Math.max(3, Math.min(WORLD - 4, py));
The player has a radius of 3, so we keep them at least 3 pixels from the left/top edge and 4 from the right/bottom (radius + 1 to stay inside the boundary line).
That's it — two clamp operations. No more void, no escaping the world. We won't embed a playground for this since it's a two-line change, but you'll see it in action in the next section.
Smooth Camera Movement
The follow camera works, but it feels rigid. It snaps to the player's position every frame with zero lag — technically correct, but there's no sense of weight or motion. A technique called linear interpolation (lerp) fixes this by making the camera glide toward the player instead of teleporting.
The idea: instead of setting the camera directly to the target, we move it a fraction of the remaining distance each frame.
const LERP = 0.08;

let camX = px - 64;
let camY = py - 64;
The camera position is now persistent state — it carries over between frames instead of being recalculated from scratch. Each frame, it closes 8% of the gap:
let targetX = px - 64;
let targetY = py - 64;

camX += (targetX - camX) * LERP;
camY += (targetY - camY) * LERP;
(targetX - camX) is the distance left to cover. Multiply by 0.08 and we get a small step toward the target. When the player is far ahead, the step is big. As the camera catches up, the step shrinks. That's what creates the smooth deceleration you feel in polished games.
The lerp factor controls the feel. 0.08 gives a noticeable float — you can see the camera lag when you change direction. 0.2 feels much snappier, almost like the raw follow camera. 0.03 feels cinematic and slow, like a drone shot. Try different values and see what fits your game.
After the lerp, we still clamp to world bounds:
camX = Math.max(0, Math.min(WORLD - CANVAS, camX));
camY = Math.max(0, Math.min(WORLD - CANVAS, camY));

camera(camX, camY);
Order matters. Lerp first, then clamp. If we clamp first and lerp after, the camera could overshoot past the bounds before snapping back — jittery and gross.
Change direction quickly and watch the camera lag behind, then catch up. That's the lerp doing its thing. Compare this to the first playground — same arena, same movement speed, completely different feel.
Screen Shake
Screen shake is the simplest way to add impact to an event. An explosion, a hit, a power-up — anything that should feel punchy gets a shake. The implementation is three lines of math: set an amplitude, decay it each frame, and apply a random offset to the camera.
We start with a shake amount variable:
const SHAKE_DECAY = 0.9;
const SHAKE_STRENGTH = 4;

let shakeAmount = 0;
When something triggers a shake, we set shakeAmount to SHAKE_STRENGTH. Each frame, we multiply by SHAKE_DECAY to fade it out:
let shakeX = 0;
let shakeY = 0;

if (shakeAmount > 0.5) {
    shakeX = (rnd(2) - 1) * shakeAmount;
    shakeY = (rnd(2) - 1) * shakeAmount;
    shakeAmount *= SHAKE_DECAY;
} else {
    shakeAmount = 0;
}

camera(camX + shakeX, camY + shakeY);
rnd(2) - 1 gives a random value between -1 and 1. Multiply by shakeAmount and we get an offset that starts strong and fades. The 0.5 threshold snaps the shake to zero once it's too small to see — without it, the screen would vibrate at sub-pixel levels forever.
The decay factor of 0.9 means the shake loses 10% of its amplitude every frame. At 60 FPS, a strength-4 shake takes about 20 frames (a third of a second) to fully decay. Higher decay (0.95) means longer shakes. Lower (0.8) means snappier ones.
The key insight is where shake gets applied: after the smooth lerp and bounds clamp. The pipeline goes: calculate target → lerp toward it → clamp to bounds → add shake offset. If we applied shake before clamping, the clamp would eat the shake at world edges. If we applied it before lerping, the lerp would smooth it out and kill the sharp jitter we want.
Complete Example
Here's everything wired together. The arena now has collectible objects scattered around — small colored circles the player can pick up. Walking into one triggers a screen shake and removes it. You can also click anywhere for a manual shake to test the feel.
engine.scope(({ start, cls, circfill, rectfill, rect, btn, click, camera, creset,
                caption, randomIntegerBetween, rnd }) => {
    const WORLD = 384;
    const CANVAS = 128;
    const SPEED = 1.5;
    const LERP = 0.08;
    const SHAKE_DECAY = 0.9;
    const SHAKE_STRENGTH = 4;

    let px = 192;
    let py = 192;
    let camX = px - 64;
    let camY = py - 64;
    let shakeAmount = 0;
    let score = 0;

    const collectColors = [8, 9, 10, 11, 12, 14];
    let collectibles = [];
    for (let i = 0; i < 15; i++) {
        collectibles.push({
            x: randomIntegerBetween(20, WORLD - 20),
            y: randomIntegerBetween(20, WORLD - 20),
            color: collectColors[i % collectColors.length],
            alive: true,
        });
    }
    const totalCollectibles = collectibles.length;

    const landmarks = [
        { x: 40, y: 40, w: 24, h: 24, color: 5 },
        { x: 300, y: 50, w: 16, h: 32, color: 5 },
        { x: 60, y: 280, w: 20, h: 20, color: 5 },
        { x: 320, y: 320, w: 28, h: 16, color: 5 },
        { x: 180, y: 80, w: 12, h: 12, color: 5 },
        { x: 260, y: 200, w: 22, h: 22, color: 5 },
    ];

    function update() {
        if (btn('ArrowLeft')) px -= SPEED;
        if (btn('ArrowRight')) px += SPEED;
        if (btn('ArrowUp')) py -= SPEED;
        if (btn('ArrowDown')) py += SPEED;

        px = Math.max(3, Math.min(WORLD - 4, px));
        py = Math.max(3, Math.min(WORLD - 4, py));

        for (const c of collectibles) {
            if (!c.alive) continue;
            let dx = px - c.x;
            let dy = py - c.y;
            if (dx * dx + dy * dy < 64) {
                c.alive = false;
                score++;
                shakeAmount = SHAKE_STRENGTH;
            }
        }

        if (click()) {
            shakeAmount = SHAKE_STRENGTH;
        }

        let targetX = px - 64;
        let targetY = py - 64;

        camX += (targetX - camX) * LERP;
        camY += (targetY - camY) * LERP;

        camX = Math.max(0, Math.min(WORLD - CANVAS, camX));
        camY = Math.max(0, Math.min(WORLD - CANVAS, camY));

        let shakeX = 0;
        let shakeY = 0;
        if (shakeAmount > 0.5) {
            shakeX = (rnd(2) - 1) * shakeAmount;
            shakeY = (rnd(2) - 1) * shakeAmount;
            shakeAmount *= SHAKE_DECAY;
        } else {
            shakeAmount = 0;
        }

        camera(camX + shakeX, camY + shakeY);
    }

    function draw() {
        cls(1);
        rect(0, 0, WORLD - 1, WORLD - 1, 6);

        for (const lm of landmarks) {
            rectfill(lm.x, lm.y, lm.x + lm.w, lm.y + lm.h, lm.color);
        }

        for (const c of collectibles) {
            if (!c.alive) continue;
            circfill(c.x, c.y, 3, c.color);
        }

        circfill(px, py, 3, 7);

        creset();
        caption(score + '/' + totalCollectibles, 1, 1, 7);
    }

    start({ sprites: {}, sounds: {}, update, draw });
});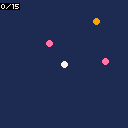
The collision check uses squared distance — dx * dx + dy * dy < 64 is the same as "distance less than 8 pixels." Squaring avoids a Math.sqrt call every frame for every collectible. The landmarks are muted (color 5, dark gray) so the colorful collectibles pop against them.
Notice how all the systems layer cleanly. Movement feeds a target position. Lerp smooths the camera toward it. Clamp keeps it in bounds. Shake adds a temporary offset on top. Each step takes the output of the previous one, and they never interfere with each other.
Going Further
- Parallax scrolling — draw background layers at different scroll speeds for depth. A distant mountain layer at 0.3× the camera offset, a midground at 0.6×, and the foreground at 1×. Simple multiplication, big visual payoff.
- Camera zones — define rectangular regions that override the camera target. Walk into a boss room and the camera locks to it. Enter a cutscene trigger and the camera pans to a specific point. Swap the lerp target when the player enters a zone.
- Camera deadzone — only move the camera when the player exceeds a threshold distance from screen center. This gives the player room to move without the camera reacting, which feels great in platformers.
- Directional bias — offset the camera in the direction the player is moving so they can see more of what's ahead. Add a fraction of the player's velocity to the target position.
- Zoom — scale the world by rendering a smaller or larger region to the same canvas. Double the camera offset math and draw everything at 2× for a zoomed-in look.
- Trauma-based shake — instead of a single shake amount, accumulate "trauma" from multiple sources and square it for the shake magnitude. Two small hits feel bigger than one medium hit. This is the system Vlambeer games use.
These camera systems are the foundation for any game with a scrolling world. The object pooling tutorial handles entity recycling, spawning and waves handles enemy flow — combine all three and you've got the bones of a survivor-like game.