How to Add Monster Spawning & Pathfinding
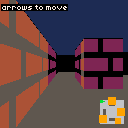
The raycasting tutorial gave us a first-person renderer — textured walls, distance shading, a minimap — but the world is empty. There's nothing to run from.
We're going to fix that by adding monsters. We'll render 2D sprites as billboards inside the 3D view, give them line-of-sight detection so they chase when they spot us, add BFS pathfinding so they navigate around walls, and wire up spawn triggers that populate the world as we explore.
Everything builds on the base raycaster from the previous tutorial. You don't need the fog or screen-shake tutorials — we're starting clean with just walls and a player.
The Starting Point
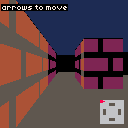
Here's the raycaster from the previous tutorial, adapted to a larger 10x10 map. It's got corridors and open spaces — room for monsters to navigate later.
If you've already done the raycasting tutorial, this is the same code with a bigger grid. If you're jumping in fresh, here are the key pieces:
- A 2D grid where
1is wall and0is floor - DDA raycasting to find wall distances for each screen column
- Textured walls drawn pixel-by-pixel with
pset() - Three-level distance shading via a
Darkenlookup table - A minimap in the bottom-right corner
The map, wall texture, shading table, and constants are all defined up front:
const Map = [
    [1, 1, 1, 1, 1, 1, 1, 1, 1, 1],
    [1, 0, 0, 0, 0, 0, 0, 0, 0, 1],
    [1, 0, 0, 0, 1, 1, 0, 0, 0, 1],
    [1, 0, 0, 0, 0, 0, 0, 0, 0, 1],
    [1, 0, 1, 0, 0, 0, 0, 1, 0, 1],
    [1, 0, 1, 0, 0, 0, 0, 1, 0, 1],
    [1, 0, 0, 0, 0, 0, 0, 0, 0, 1],
    [1, 0, 0, 0, 1, 1, 0, 0, 0, 1],
    [1, 0, 0, 0, 0, 0, 0, 0, 0, 1],
    [1, 1, 1, 1, 1, 1, 1, 1, 1, 1],
];

const sprites = { wall: WallTexture };

let px = 1.5;
let py = 1.5;
let pa = 0;
The player starts at 1.5, 1.5 — the center of cell [1][1] — facing right.
The raycasting loop is the same as before. For each screen column, we cast a ray using DDA, find the wall distance, and draw a textured stripe:
for (let x = 0; x < 128; x++) {
    const cameraX = (2 * x) / 128 - 1;
    const rdx = dirX + planeX * cameraX;
    const rdy = dirY + planeY * cameraX;

    // DDA to find the nearest wall...

    const perpDist =
        side === 0
            ? sideDistX - deltaDistX
            : sideDistY - deltaDistY;

    const stripeH = Math.floor(128 / perpDist);
    // draw textured wall stripe with distance shading...
}
Walk around and get familiar with the layout. Next up, we're putting monsters in it.
Billboard Sprites
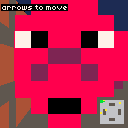
A billboard sprite is a 2D image drawn at a world position inside the 3D view. It always faces the camera — no rotation needed. This is how Wolfenstein 3D rendered its enemies, items, and decorations.
To draw sprites correctly, we need to know which screen columns are already occupied by closer walls. During the wall-drawing loop, we store each column's perpendicular distance in a zBuffer array:
const zBuffer = new Array(128);

for (let x = 0; x < 128; x++) {
    // ... existing DDA raycasting ...

    zBuffer[x] = perpDist;

    // ... draw wall stripe ...
}
Now for the fun part — the sprite transform. Each monster has a world position (m.x, m.y). To figure out where it lands on screen, we project it through the inverse camera matrix:
const invDet = 1 / (planeX * dirY - dirX * planeY);

const sx = m.x - px;
const sy = m.y - py;

const transformX = invDet * (dirY * sx - dirX * sy);
const transformY = invDet * (-planeY * sx + planeX * sy);
transformY is the depth — how far the sprite is along the camera's forward direction. If it's zero or negative, the sprite is behind us. transformX determines the horizontal position on screen:
const screenX = Math.floor((128 / 2) * (1 + transformX / transformY));The sprite's screen size scales the same way as walls — 128 / transformY:
const sprH = Math.floor(128 / transformY);
const sprW = sprH;

const drawStartY = Math.max(0, Math.floor(64 - sprH / 2));
const drawEndY = Math.min(128, Math.floor(64 + sprH / 2));
const drawStartX = Math.max(0, Math.floor(screenX - sprW / 2));
const drawEndX = Math.min(128, Math.floor(screenX + sprW / 2));
Then we draw it column by column, skipping any column where the wall is closer:
for (let stripe = drawStartX; stripe < drawEndX; stripe++) {
    if (transformY >= zBuffer[stripe]) continue;

    const tx = Math.floor(
        ((stripe - (screenX - sprW / 2)) * 8) / sprW,
    );

    for (let y = drawStartY; y < drawEndY; y++) {
        const ty = Math.floor(
            ((y - (64 - sprH / 2)) * 8) / sprH,
        );

        let color = sprites.monster[ty * 8 + tx];
        if (color < 0) continue;

        // apply distance shading same as walls
        if (transformY >= 6) {
            color = Darken[Darken[color]];
        } else if (transformY >= 3) {
            color = Darken[color];
        }

        pset(stripe, y, color);
    }
}
That zBuffer check on each column is what makes sprites disappear behind walls. Without it, monsters would draw on top of everything.
One more thing: when multiple sprites overlap, closer ones should paint over farther ones. We sort monsters by distance before drawing, farthest first:
const sorted = monsters
.map((m, i) => ({
i,
dist: (m.x - px) * (m.x - px) + (m.y - py) * (m.y - py),
}))
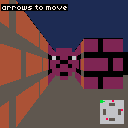
.sort((a, b) => b.dist - a.dist);The monsters also show up as red dots on the minimap. Walk around — you'll see them poking out from behind walls and scaling with distance.
Chasing the Player
Static monsters aren't scary. Let's make them move.
Each monster gets a chasing state. Every frame, we check whether it can see the player. If it can, it walks straight toward you. If a wall's in the way, it stands still — pathfinding comes next.
Line of Sight
The line-of-sight check reuses the same DDA algorithm from the raycaster. We cast a ray from the monster toward the player. If it hits a wall cell before reaching the player's cell, LOS is blocked:
function hasLineOfSight(fromX, fromY, toX, toY) {
    const dx = toX - fromX;
    const dy = toY - fromY;
    const dist = Math.sqrt(dx * dx + dy * dy);
    if (dist < 0.01) return true;

    const rdx = dx / dist;
    const rdy = dy / dist;

    let mx = Math.floor(fromX);
    let my = Math.floor(fromY);

    const deltaDistX = Math.abs(rdx) < 1e-10 ? 1e30 : Math.abs(1 / rdx);
    const deltaDistY = Math.abs(rdy) < 1e-10 ? 1e30 : Math.abs(1 / rdy);

    // ... same DDA stepping as the raycaster ...

    const targetCellX = Math.floor(toX);
    const targetCellY = Math.floor(toY);

    for (let i = 0; i < 100; i++) {
        if (sideDistX < sideDistY) {
            sideDistX += deltaDistX;
            mx += stepX;
        } else {
            sideDistY += deltaDistY;
            my += stepY;
        }

        if (mx === targetCellX && my === targetCellY) return true;
        if (Map[my]?.[mx] === 1) return false;
    }

    return false;
}
It's cheap — one DDA traversal per monster per frame. And since it's the same algorithm we already know from wall rendering, there's nothing new to learn.
Movement
When a monster has line of sight, it moves directly toward the player. The movement uses separate-axis collision — same approach as the player. Try X first, check for walls, then try Y:
const MonsterSpeed = 0.02;

for (const m of monsters) {
    m.chasing = hasLineOfSight(m.x, m.y, px, py);

    if (m.chasing) {
        const dx = px - m.x;
        const dy = py - m.y;
        const dist = Math.sqrt(dx * dx + dy * dy);

        const moveX = (dx / dist) * MonsterSpeed;
        const moveY = (dy / dist) * MonsterSpeed;

        const nx = m.x + moveX;
        const ny = m.y + moveY;

        if (Map[Math.floor(m.y)][Math.floor(nx)] === 0) m.x = nx;
        if (Map[Math.floor(ny)][Math.floor(m.x)] === 0) m.y = ny;
    }
}
Separate-axis collision means monsters slide along walls instead of getting stuck on corners. If the X move would put them in a wall, only the Y move applies, and vice versa.
Getting Caught
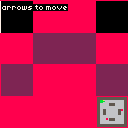
When a monster gets close enough (distance < 0.4), the screen flashes red for 60 frames and the monster resets to its starting position:
if (dist < 0.4) {
    caught = 60;
    m.x = 5.5;
    m.y = 1.5 + monsters.indexOf(m) * 3;
    m.chasing = false;
    continue;
}
On the minimap, chasing monsters show as yellow dots instead of red. Try walking into a monster's line of sight and ducking behind a wall — you'll see it stop when it loses you.
Pathfinding Around Walls
Right now, monsters freeze when they lose line of sight. You can just duck behind a wall and the threat disappears. Let's fix that with BFS pathfinding — when a monster can't see you, it finds a route around the walls.
BFS on the Grid
BFS (breadth-first search) explores the map layer by layer outward from the monster's cell until it reaches the player's cell. It uses a FIFO queue and 4-directional movement:
function bfs(startX, startY, goalX, goalY) {
    const sx = Math.floor(startX);
    const sy = Math.floor(startY);
    const gx = Math.floor(goalX);
    const gy = Math.floor(goalY);

    if (sx === gx && sy === gy) return [];

    const visited = new Set();
    const queue = [{ x: sx, y: sy, path: [] }];
    visited.add(sy * Constants.MapSize + sx);

    const dirs = [[0, -1], [1, 0], [0, 1], [-1, 0]];

    while (queue.length > 0) {
        const { x, y, path } = queue.shift();

        for (const [dx, dy] of dirs) {
            const nx = x + dx;
            const ny = y + dy;
            const key = ny * Constants.MapSize + nx;

            if (visited.has(key)) continue;
            if (Map[ny]?.[nx] !== 0) continue;

            visited.add(key);

            const newPath = [...path, { x: nx + 0.5, y: ny + 0.5 }];

            if (nx === gx && ny === gy) return newPath;

            queue.push({ x: nx, y: ny, path: newPath });
        }
    }

    return [];
}
Each path node targets the center of a grid cell (+ 0.5). The visited set uses y * MapSize + x as a flat key to avoid string allocation. BFS guarantees the shortest path on an unweighted grid.
We're using BFS instead of A* because it's simpler and the map is small enough that it doesn't matter. If you want to explore A*, Dijkstra, or weighted pathfinding, the pathfinding tutorial covers all of that.
Switching Between Chase and Pathfinding
The monster AI now has two modes. When it has line of sight, it chases directly. When it doesn't, it follows the BFS path:
if (los) {
    targetX = px;
    targetY = py;
    m.path = [];
} else {
    m.pathAge++;
    if (m.path.length === 0 || m.pathAge >= PathRecalcInterval) {
        m.path = bfs(m.x, m.y, px, py);
        m.pathAge = 0;
    }

    if (m.path.length > 0) {
        targetX = m.path[0].x;
        targetY = m.path[0].y;

        const dx = targetX - m.x;
        const dy = targetY - m.y;
        if (Math.sqrt(dx * dx + dy * dy) < 0.2) {
            m.path.shift();
        }
    } else {
        continue;
    }
}
When the monster gets within 0.2 units of a path node, it pops that node and moves toward the next one. When line of sight comes back, the path is cleared and it switches to direct chase.
Throttling
Running BFS for every monster every frame would be wasteful. Each monster tracks a pathAge counter instead. Paths only recalculate every 30 frames — about half a second. That's plenty for a 10x10 map. On larger maps you'd want to stagger recalculations so they don't all run BFS on the same frame.
Watch the minimap — you'll see monsters navigating around walls to reach you even when they can't see you. Orange dots are pathfinding, yellow dots have line of sight.
Spawn Triggers
Having all the monsters present from the start feels flat. It's more interesting when they show up as you explore — walk into a new area and enemies materialize around you.
Spawn Zones
Spawn zones are stored separately from the map grid. Each zone has a center position, a trigger radius, and a count of how many monsters to create:
const spawnZones = [
    { x: 5, y: 1.5, radius: 1.5, count: 2, triggered: false },
    { x: 8, y: 5, radius: 1.5, count: 1, triggered: false },
    { x: 2, y: 7.5, radius: 1.5, count: 2, triggered: false },
    { x: 7, y: 8, radius: 1, count: 1, triggered: false },
];

const monsters = [];
The monsters array starts empty. Nothing exists until the player walks into a zone.
Triggering
Every frame, we check whether the player is within range of any untriggered zone:
for (const zone of spawnZones) {
    if (zone.triggered) continue;
    const dx = px - zone.x;
    const dy = py - zone.y;
    if (Math.sqrt(dx * dx + dy * dy) < zone.radius) {
        zone.triggered = true;
        for (let i = 0; i < zone.count; i++) {
            spawnMonster(zone.x, zone.y, zone.radius);
        }
    }
}
Once triggered, the zone is marked and won't fire again. The spawnMonster function picks a random floor position within the zone's radius:
function spawnMonster(zoneX, zoneY, radius) {
    let mx, my;
    for (let attempt = 0; attempt < 20; attempt++) {
        mx = zoneX + (Math.random() - 0.5) * radius;
        my = zoneY + (Math.random() - 0.5) * radius;
        if (
            mx > 0.5 && mx < Constants.MapSize - 0.5 &&
            my > 0.5 && my < Constants.MapSize - 0.5 &&
            Map[Math.floor(my)][Math.floor(mx)] === 0
        ) {
            break;
        }
    }
    monsters.push({
        x: mx,
        y: my,
        chasing: false,
        path: [],
        pathAge: 0,
        spawnTimer: SpawnBlinkFrames,
    });
}
It tries up to 20 random positions to avoid placing monsters inside walls. The spawnTimer gives newly spawned monsters a brief window where they blink and don't move — a bit of visual flair so they don't just pop in.
Spawn Blink Effect
During the spawn timer, the monster skips its AI update and blinks on and off every 6 frames:
if (m.spawnTimer > 0) {
    m.spawnTimer--;
    continue;
}
For rendering, we only draw the monster on the visible frames of the blink cycle:
const visibleMonsters = monsters.filter(
    (m) => m.spawnTimer <= 0 || m.spawnTimer % 6 < 3,
);
Minimap Indicators
Untriggered spawn zones show as orange squares on the minimap so you can see where danger is waiting. They disappear once triggered:
for (const zone of spawnZones) {
    if (zone.triggered) continue;
    const zx = Constants.MmX + Math.floor(zone.x * Constants.Cell);
    const zy = Constants.MmY + Math.floor(zone.y * Constants.Cell);
    const zr = Math.floor(zone.radius * Constants.Cell);
    rectfill(zx - zr, zy - zr, zx + zr, zy + zr, 9);
}
Walk toward the orange zones on the minimap and watch monsters blink into existence around you.
Going Further
We've got billboard sprites, line-of-sight chasing, BFS pathfinding, and area-based spawning. That's a solid foundation. Here are some directions to take it next:
- Multiple monster types — different sprites, speeds, and behaviors. A fast one that charges on sight, a slow one that always pathfinds, a stationary turret that attacks at range.
- Combat — press a key to shoot a ray from the player's position. If it hits a monster before a wall, deal damage. Give monsters health bars and death animations.
- Difficulty scaling — increase spawn counts or monster speed as the player clears zones. Or add a wave system where clearing all monsters triggers the next spawn.
- Sound effects — a growl when a monster spots you, footsteps when it's chasing, an ambient hum near untriggered spawn zones.
- Combine with fog and lighting — the fog and lighting tutorial adds atmospheric rendering. Monsters emerging from darkness hit different.
- Patrol routes — instead of standing still when idle, have monsters follow preset waypoint paths. When they spot the player, they break from the route and chase.
- A* pathfinding — BFS finds the shortest path but explores everything. A* uses a heuristic to search more efficiently. The pathfinding tutorial covers BFS, Dijkstra, and A* in depth.