How to Build an Atmospheric Horror FPS
We've covered a lot of ground in the raycasting series: screen shake and view bobbing, distance fog and dithered lighting, monster spawning and BFS pathfinding, scene and level management, decals and props, and PNG-based level design. This tutorial brings all of it together.
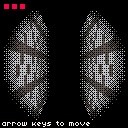
We're building a corridor horror FPS. You wake up in a dark facility. The corridors are tight, the torchlight barely reaches the walls ahead, and something is hunting you. Your only goal is to find the exit before it finds you. There's no weapon — just movement, wits, and the hope that you hear the footsteps before you feel the damage.
Everything we need is already in our toolkit:
- Raycasting renderer with a 24×24 PNG-defined map
- Fog and dithered lighting for the oppressive atmosphere
- LOS detection and BFS pathfinding driving enemy AI
- Screen shake and health flash on damage
- Torch flicker and view bob for physical immersion
- A state machine managing the title screen, gameplay, and win/lose screens
By the end we'll have a complete, shippable horror game — and a solid sense of how to wire multiple systems into a single cohesive experience.
Setting the Scene
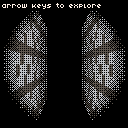
Before we add enemies, health, or atmosphere, we need the world. Let's get the dark corridors rendering first — the raycasting loop, fog, and torch falloff that everything else builds on.
The Map
The level is a 24×24 grid — 1 for walls, 0 for open space. Tight corridors, dead ends, and a single exit tucked in the far corner. Oppressive without being a pure maze.
const Map = [
  [1,1,1,1,1,1,1,1,1,1,1,1,1,1,1,1,1,1,1,1,1,1,1,1],
  [1,0,0,0,0,0,0,0,0,0,0,0,0,0,0,0,0,0,0,0,0,0,0,1],
  [1,0,1,1,0,1,1,1,0,1,1,0,1,0,1,1,1,0,1,1,0,1,0,1],
  // ... (full 24×24 grid)
];
We spawn the player at { x: 1.5, y: 1.5 } — the centre of the first open cell.
Constants
Everything tunable lives in one object:
const Constants = {
  Fov: Math.PI / 3,
  MoveSpeed: 0.04,
  RotSpeed: 0.03,
  SpawnX: 1.5,
  SpawnY: 1.5,
  FogStart: 0.2,
  MaxDist: 1.5,
  TorchStrength: 0.65,
  TorchFlicker: 0.08,
};
FogStart and MaxDist are intentionally tight. Fog starts at 0.2 and is complete by 1.5. The darkness is the point.
The Raycasting Loop
For each vertical column of pixels, we cast a ray and find where it hits a wall:
for (let x = 0; x < viewW; x++) {
  const cameraX = (2 * x) / viewW - 1;
  const rdx = dirX + planeX * cameraX;
  const rdy = dirY + planeY * cameraX;

  // DDA — step through the grid until we hit a wall
  let side;
  while (true) {
    if (sideDistX < sideDistY) {
      sideDistX += deltaDistX;
      mapX += stepX;
      side = 0;
    } else {
      sideDistY += deltaDistY;
      mapY += stepY;
      side = 1;
    }
    if (Map[mapY]?.[mapX] === 1) break;
  }

  const perpDist = side === 0 ? sideDistX - deltaDistX : sideDistY - deltaDistY;
  const stripeH = Math.floor(viewH / perpDist);
}
perpDist is the corrected wall distance. A straight Euclidean distance would cause fisheye distortion — perpDist avoids that. stripeH is how tall the wall stripe is at that depth.
Fog and Torch Falloff
Fog is a linear ramp from FogStart to MaxDist:
function fogAmount(dist) {
  return Math.min(1, Math.max(0, (dist - Constants.FogStart) / (Constants.MaxDist - Constants.FogStart)));
}
Raw distance isn't the whole story, though. The torch doesn't reach the edges of the screen as well as the centre — so we reduce the effective distance based on column position before running it through fogAmount:
const colOffset = Math.abs(x - viewW / 2) / (viewW / 2);
const torchReduce = Constants.TorchStrength * (1 - colOffset * colOffset);
const effectiveDist = Math.max(0, perpDist - torchReduce);
const fogFactor = fogAmount(effectiveDist);
colOffset * colOffset gives us a quadratic curve — smooth circular falloff instead of a harsh linear edge.
Vignette
Once the walls are drawn, we apply a radial vignette to darken everything outside the torch circle. Instead of fading it, we use the Bayer 4×4 matrix to threshold it — the same dithering trick from the fog and lighting tutorial:
for (let sy = 0; sy < viewH; sy++) {
  for (let sx = 0; sx < viewW; sx++) {
    const r2 = cx * cx + cy * cy;
    const vignette = Math.min(1, Math.max(0, (r2 - 0.4) / 0.6));
    if (vignette > Bayer[(sy % 4) * 4 + (sx % 4)]) pset(sx, sy, 0);
  }
}
Dithering to hard black rather than blending gives the edge a grainy, organic feel. It's what makes the torch look real.
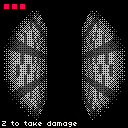
Player Health & Damage
Horror lives and dies by consequence. Without a health system, the corridors are just a maze. With one, every sound becomes a threat. Let's add three hit points, a HUD to show them, and a physical response when the player takes damage.
Health State
Health is an array of booleans — true for full, false for lost:
let health = [true, true, true];
let flashTimer = 0;
let shakeTimer = 0;
An array makes the HUD trivial to render — iterate and draw a filled or dimmed square per slot. Taking damage finds the last true and flips it:
function takeDamage() {
  const idx = health.lastIndexOf(true);
  if (idx === -1) return;
  health[idx] = false;
  flashTimer = 12;
  shakeTimer = 8;
}
lastIndexOf works from the right, so the HUD empties left-to-right.
Screen Shake
Shake works by offsetting the entire scene with camera() for a few frames. The tricky bit is when to call it:
function draw() {
  creset();
  cls(0);

  if (shakeTimer > 0) {
    camera((rnd(2) - 1) * 2, (rnd(2) - 1) * 2);
    shakeTimer--;
  }

  // ... raycasting and vignette ...

  creset(); // reset before drawing the HUD
  // ... HUD drawing ...
}
We call creset() at the top of draw() to clear any leftover offset from last frame. Then camera() applies the random jitter before the raycasting runs. We call creset() again before the HUD — so the health squares stay pinned to the screen no matter how much we're shaking.
Damage Flash
A dithered red overlay does more to sell a hit than almost anything else. The intensity fades over 12 frames using the Bayer matrix as a threshold:
if (flashTimer > 0) {
  const intensity = flashTimer / 12;
  for (let fy = 0; fy < viewH; fy++) {
    for (let fx = 0; fx < viewW; fx++) {
      if (intensity > Bayer[(fy % 4) * 4 + (fx % 4)]) pset(fx, fy, 8);
    }
  }
  flashTimer--;
}
At frame 1 of 12, almost every pixel is red. By frame 12, it's just a faint dither pattern. The result feels physical — like something clearing from your eyes — rather than a clean dissolve.
The HUD
We draw the HUD after the second creset() so shake doesn't drag it around:
for (let i = 0; i < Constants.PlayerMaxHealth; i++) {
  rectfill(4 + i * 8, 4, 9 + i * 8, 9, health[i] ? 8 : 5);
}
Full slots are red (color 8), empty slots are dark grey (color 5). Present but hollow. No icons needed.
Monsters & Dread
An empty maze is a puzzle. Put something in it and it becomes a horror game. Let's add enemies — they spawn in fixed positions, detect us using line-of-sight, hunt using BFS pathfinding, and deal damage on contact.
Enemy State
Each monster is a plain object. We track position, whether it's chasing, the current path, and a hit cooldown to prevent instant multi-hit:
let monsters = EnemySpawns.map(s => ({
  x: s.x, y: s.y,
  chasing: false,
  seenPlayer: false,
  path: [],
  pathAge: 0,
  hitCooldown: 0,
  dead: false,
}));
EnemySpawns is an array of { x, y } positions distributed around the map.
Line-of-Sight Detection
Before a monster can chase us, it needs to see us. Line-of-sight uses the same DDA step as the raycasting loop — it marches from the monster toward the player and stops as soon as it either arrives or hits a wall:
function hasLineOfSight(fromX, fromY, toX, toY) {
  const rdx = dx / dist;
  const rdy = dy / dist;

  // DDA step toward the target
  while (true) {
    if (sdx < sdy) { sdx += ddx; mx += stepX; }
    else { sdy += ddy; my += stepY; }
    if (mx === tx && my === ty) return true;  // reached target cell
    if (Map[my]?.[mx] === 1) return false;    // hit a wall
  }
}
If LOS is clear and the monster hasn't spotted us before, it plays a detection sound and sets chasing:
if (los) {
  if (!m.seenPlayer) {
    m.seenPlayer = true;
    sfx('clunk');
  }
  m.chasing = true;
}
The sound itself is a short synthesised clunk registered in sounds:
const sounds = { clunk: [5, [8, 0.8, 1], [5, 0.5, 1], [0, 0, 0]] };BFS Pathfinding
When LOS breaks — we ducked around a corner — the monster falls back to BFS:
function bfs(startX, startY, goalX, goalY) {
  const visited = new Set();
  const queue = [{ x: sx, y: sy, path: [] }];

  while (queue.length > 0) {
    const { x, y, path } = queue.shift();
    for (const [dx, dy] of [[0,-1],[1,0],[0,1],[-1,0]]) {
      const nx = x + dx;
      const ny = y + dy;
      if (visited.has(key) || Map[ny]?.[nx] !== 0) continue;
      const newPath = [...path, { x: nx + 0.5, y: ny + 0.5 }];
      if (nx === gx && ny === gy) return newPath;
      queue.push({ x: nx, y: ny, path: newPath });
    }
  }
  return [];
}
We don't run BFS every frame — that'd be expensive. Every 30 frames is frequent enough to feel reactive:
if (m.path.length === 0 || m.pathAge >= 30) {
  m.path = bfs(m.x, m.y, px, py);
  m.pathAge = 0;
}
The monster pops waypoints off the front of the path as it gets close to each one.
Collision & Damage
When a monster closes to within 0.4 units with a clear line of sight, it deals damage and removes itself:
if (dist < 0.4 && los && m.hitCooldown <= 0) {
  takeDamage(m.x, m.y);
  m.dead = true;
  continue;
}
takeDamage also shoves us slightly away from the monster. Combined with screen shake, the hit feels like an actual impact.
Rendering Monsters in 3D
Each monster renders as a billboard — a flat 8×8 sprite that always faces the camera. We project it using the same camera plane as the raycasting loop:
const transformX = invDet * (dirY * relX - dirX * relY);
const transformY = invDet * (-planeY * relX + planeX * relY);
if (transformY <= 0) continue; // behind the camera

const screenX = Math.floor((viewW / 2) * (1 + transformX / transformY));
const sprH = Math.floor(viewH / transformY);
For each column of the sprite, we check transformY against zBuffer[stripe] — the wall depth we stored during the main pass. If a wall's closer, we skip that column. Monsters disappear behind corners correctly:
if (transformY >= zBuffer[stripe]) continue;-1 in the sprite array means transparent — we skip those pixels. Fog and vignette apply to monster pixels the same way they apply to walls.
Atmosphere
The mechanics work. Now let's make them feel like something. The torch flickers, movement has physical weight, and the audio reacts to what's nearby. None of this changes the rules — but all of it changes how the game feels.
Torch Flicker
The torch strength used to be a constant. Now it varies slightly every frame:
const torchStrength = Constants.TorchStrength + (rnd(2) - 1) * Constants.TorchFlicker;rnd(2) gives us a float in [0, 2), so (rnd(2) - 1) is [-1, 1). Multiplied by Constants.TorchFlicker (0.08), that's ±8% per frame. We pass torchStrength into the falloff calculation instead of the fixed constant — every wall stripe and monster sprite now breathes with it.
It's recalculated fresh each frame, so there's no pattern to detect. That's what makes it feel like a real flame rather than an animation.
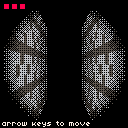
View Bob
Walking should feel like walking. We track a bobTimer that increments while the player's moving and drives a sine offset on the camera:
if (isMoving) bobTimer += 0.12;const bobOffset = isMoving ? Math.sin(bobTimer) * 1.5 : 0;We combine the bob with screen shake in a single camera() call:
camera(shakeX, shakeY + bobOffset);When we stop moving, bobOffset snaps to zero. A polished game would ease that out — but at this movement speed, the snap actually feels fine.
Heartbeat Tension
When a monster gets within half the detection radius, we play a heartbeat sound every 60 frames — about once a second:
const tensionDist = Constants.DetectionRadius / 2;
const nearMonster = monsters.some(m => {
  const dx = m.x - px;
  const dy = m.y - py;
  return Math.sqrt(dx * dx + dy * dy) < tensionDist;
});

if (nearMonster && heartbeatTimer >= 60) {
  sfx('heartbeat');
  heartbeatTimer = 0;
}
It's a short synthesised pulse:
const sounds = {
  clunk: [5, [8, 0.8, 1], [5, 0.5, 1], [0, 0, 0]],
  heartbeat: [3, [3, 0.6, 2], [1, 0, 0], [0, 0, 0]],
};
The heartbeat plays whether the monster has line-of-sight or not. We can hear the danger before we can see it. That gap between audio and visual is where the dread lives.
The Complete Game
Every mechanic is in place. Now we wire them together with a state machine — a title screen, a win condition, a lose condition, and a clean restart.
The State Machine
Game state is a single string — 'title', 'playing', 'win', or 'lose'. Both update() and draw() branch on it:
let gameState = 'title';In update():
if (gameState === 'title') {
  if (btn('z')) {
    resetGame();
    gameState = 'playing';
  }
  return;
}

if (gameState === 'win' || gameState === 'lose') {
  if (btn('z')) gameState = 'title';
  return;
}

// ... all the playing logic
In draw(), non-playing states get a black fill and a couple of text lines, then return early — nothing leaks through:
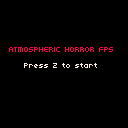
if (gameState === 'title') {
  cls(0);
  caption('ATMOSPHERIC HORROR FPS', 9, 46, 8);
  caption('Press Z to start', 24, 62, 7);
  return;
}
The early return keeps each state's rendering isolated. No health HUD bleeding onto the title screen.
Resetting the Game
All mutable state lives in resetGame():
function resetGame() {
  px = Constants.SpawnX;
  py = Constants.SpawnY;
  pa = 0;
  health = [true, true, true];
  flashTimer = 0;
  shakeTimer = 0;
  bobTimer = 0;
  isMoving = false;
  heartbeatTimer = 0;
  monsters = EnemySpawns.map(s => ({
    x: s.x, y: s.y,
    chasing: false,
    seenPlayer: false,
    path: [],
    pathAge: 0,
    hitCooldown: 0,
    dead: false,
  }));
}
We call it once at startup so the game's ready immediately, and again each time the player presses Z from the title screen. Monster positions, chase state, health — everything resets.
Win and Lose Conditions
We check both at the end of the playing update:
if (isDead()) {
  gameState = 'lose';
  return;
}

const edx = px - ExitPos.x;
const edy = py - ExitPos.y;
if (Math.sqrt(edx * edx + edy * edy) < 0.6) {
  gameState = 'win';
  return;
}
ExitPos is a world-space coordinate in the far corner of the map. Walk within 0.6 units of it and you win — no button press, just getting there.
The Exit Door
The exit isn't marked on a minimap or labelled with text — you have to find it. But it does leave a clue: the walls adjacent to the exit position glow green (color 11) instead of the standard stone:
const isExitWall = (mapX === exitWallX && mapY === exitWallY - 1)
  || (mapX === exitWallX - 1 && mapY === exitWallY);

let color = isExitWall ? 11 : sprites.wall[ty * 16 + tx];
Fog still applies, so you won't see the glow until you're close. That's intentional. The reward for exploring rather than panicking is catching that glimpse of green in the dark.